TOC
初めに
はじめまして、9月に入社しましたiOSエンジニアのoukaと申します。 犬のコーギーが好きで、朝散歩しているコーギーに出会うと一日が最高にハッピーな気分になります。
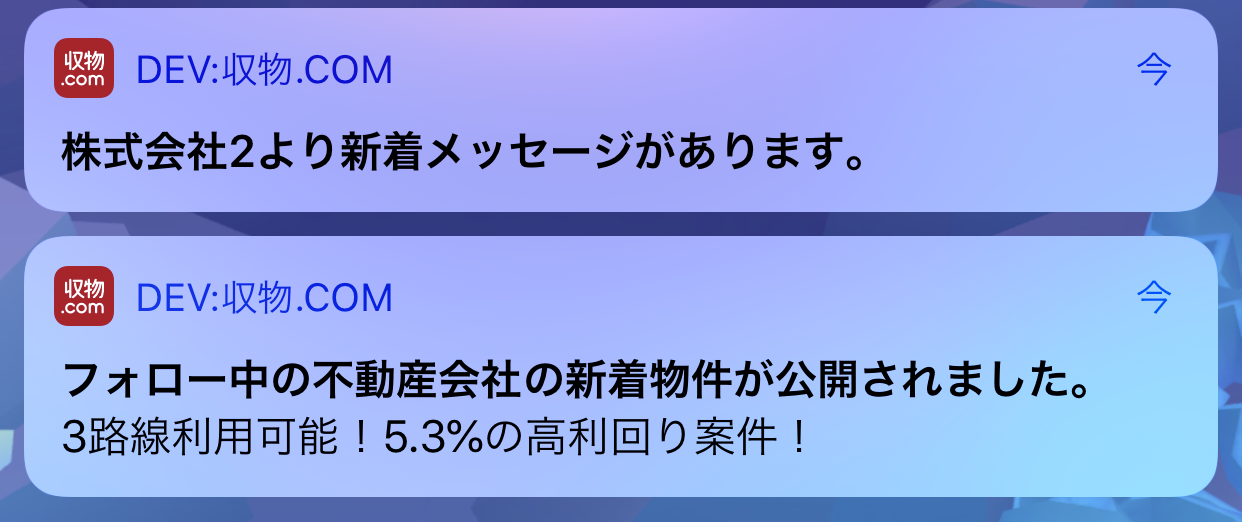
弊社のiOSアプリは「収益物件.com」と「民泊物件.com」の2つがあります。 収益物件.comは投資初心者向けの不動産投資情報アプリとして9月にリリースされました! 収益物件.comでは以下の時などにPush通知を送信しています。
- 不動産会社からのチャットの返信がきたとき
- フォロー中の不動産会社が新着物件を掲載したとき
前回の記事で紹介がありましたが、収益物件.comのバックエンドはCakePHPとFirebaseを使用しており、 チャット機能ではCloud Firestore、Push通知ではFirebase Cloud Messaging(FCM)を利用しています。 今回はCloud Messaging経由で送っているPush通知に画像をつけていきたいと思います。
実装
Notification Extensionを作成する
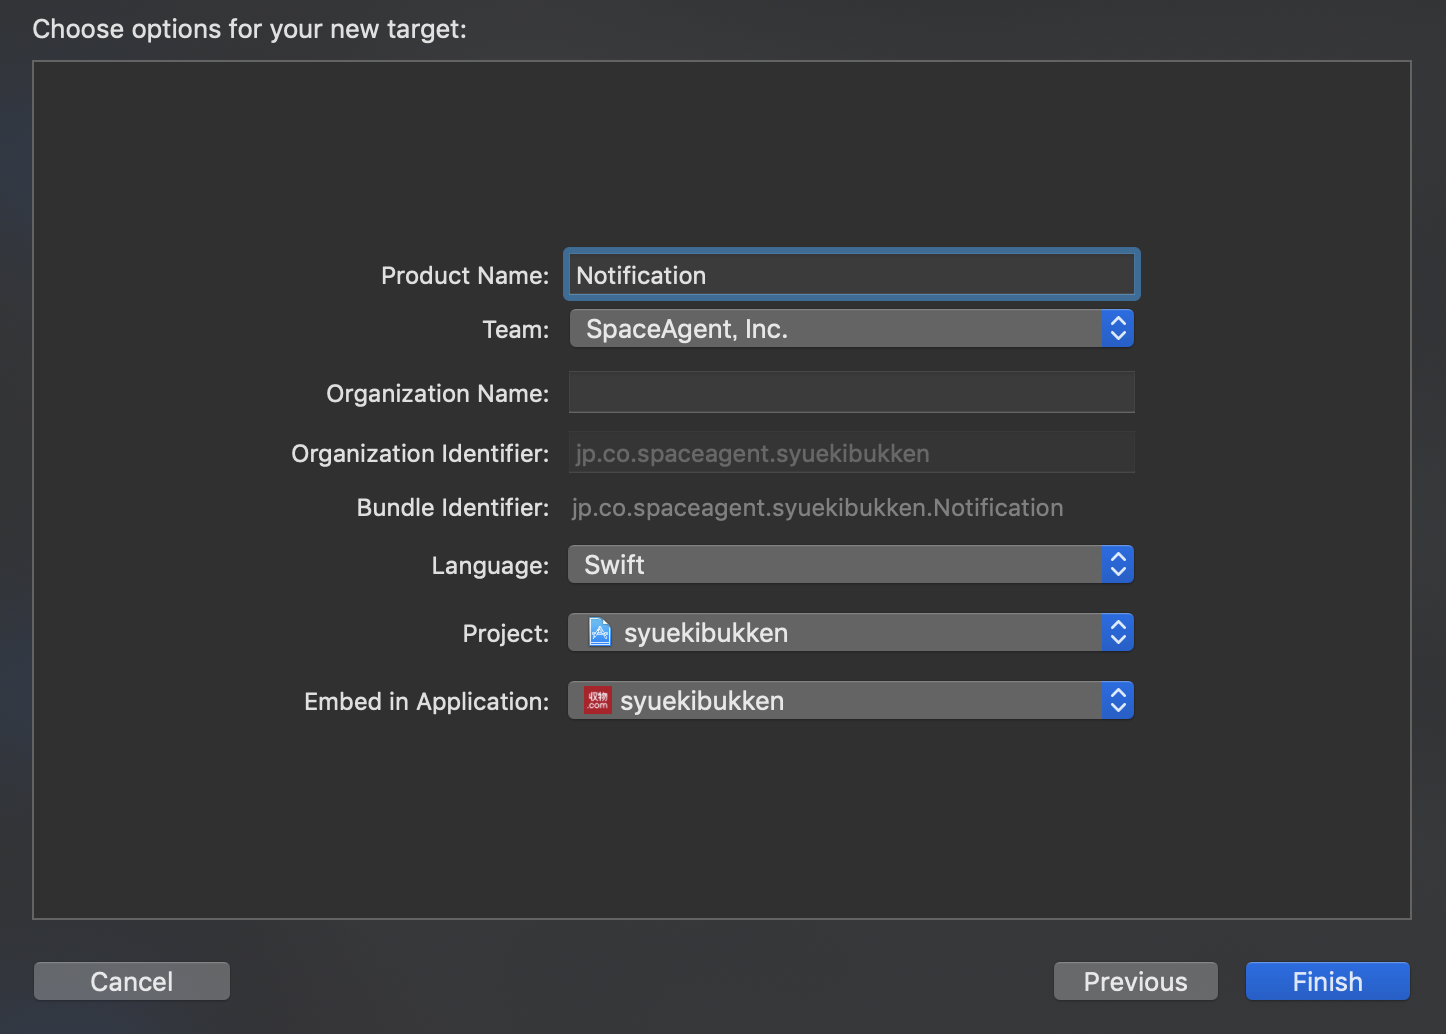
まず、Notification Extensionを追加します。 File->New->Targetを選択してNotification Extensionを追加します。

これに合わせて、Notification Extension用のProvisioningProfileを作成しておきます。
Push通知を受け取る実装
Notification Extensionを追加すると、入力したProductName内にNotificationService.swiftとInfo.plistが作成されます。Push通知を受け取る処理をdidReceiveメソッドに記述します。
まず、image-urlにセットされた画像URLを読み込んでファイルに保存します。そのファイルを読みこんでbestAttemptContent.attachmentsにattachmentをセットしてハンドラーを呼び出すことで画像が表示されるようになります。
import UserNotifications

class NotificationService: UNNotificationServiceExtension {

    var contentHandler: ((UNNotificationContent) -> Void)?
    var bestAttemptContent: UNMutableNotificationContent?

    override func didReceive(_ request: UNNotificationRequest, withContentHandler contentHandler: @escaping (UNNotificationContent) -> Void) {
        self.contentHandler = contentHandler
        bestAttemptContent = (request.content.mutableCopy() as? UNMutableNotificationContent)
        if let bestAttemptContent = bestAttemptContent {
            guard let urlImageString = request.content.userInfo["image-url"] as? String else {
                contentHandler(bestAttemptContent)
                return
            }

            if let url = URL(string: urlImageString) {
                guard let imageData = NSData(contentsOf: url) else {
                    contentHandler(bestAttemptContent)
                    return
                }
                guard let attachment = UNNotificationAttachment.saveImageToDisk(fileIdentifier: "image.jpg", data: imageData, options: nil) else {
                    contentHandler(bestAttemptContent)
                    return
                }

                bestAttemptContent.attachments = [ attachment ]
            }
            contentHandler(bestAttemptContent)
        }
    }

    override func serviceExtensionTimeWillExpire() {
        // Called just before the extension will be terminated by the system.
        // Use this as an opportunity to deliver your "best attempt" at modified content, otherwise the original push payload will be used.
        if let contentHandler = contentHandler, let bestAttemptContent =  bestAttemptContent {
            contentHandler(bestAttemptContent)
        }
    }
}

    @available(iOSApplicationExtension 10.0, *)
    extension UNNotificationAttachment {

        static func saveImageToDisk(fileIdentifier: String, data: NSData, options: [NSObject : AnyObject]?) -> UNNotificationAttachment? {
            let fileManager = FileManager.default
            let folderName = ProcessInfo.processInfo.globallyUniqueString
            guard let folderURL = NSURL(fileURLWithPath: NSTemporaryDirectory()).appendingPathComponent(folderName, isDirectory: true) else {
                return nil
            }

            do {
                try fileManager.createDirectory(at: folderURL, withIntermediateDirectories: true, attributes: nil)
                let fileURL = folderURL.appendingPathComponent(fileIdentifier)
                try data.write(to: fileURL, options: [])
                let attachment = try UNNotificationAttachment(identifier: fileIdentifier, url: fileURL, options: options)
                return attachment
            } catch let error {
                print("error \(error)")
            }

            return nil
        }
}serviceExtensionTimeWillExpireメソッドはdidReceive内の処理がタイムアウトしたときに呼ばれるメソッドです。タイムアウトをハンドリングしたい場合はここを書き換えればいいかと思います。
PusherでPush通知を送ってみる
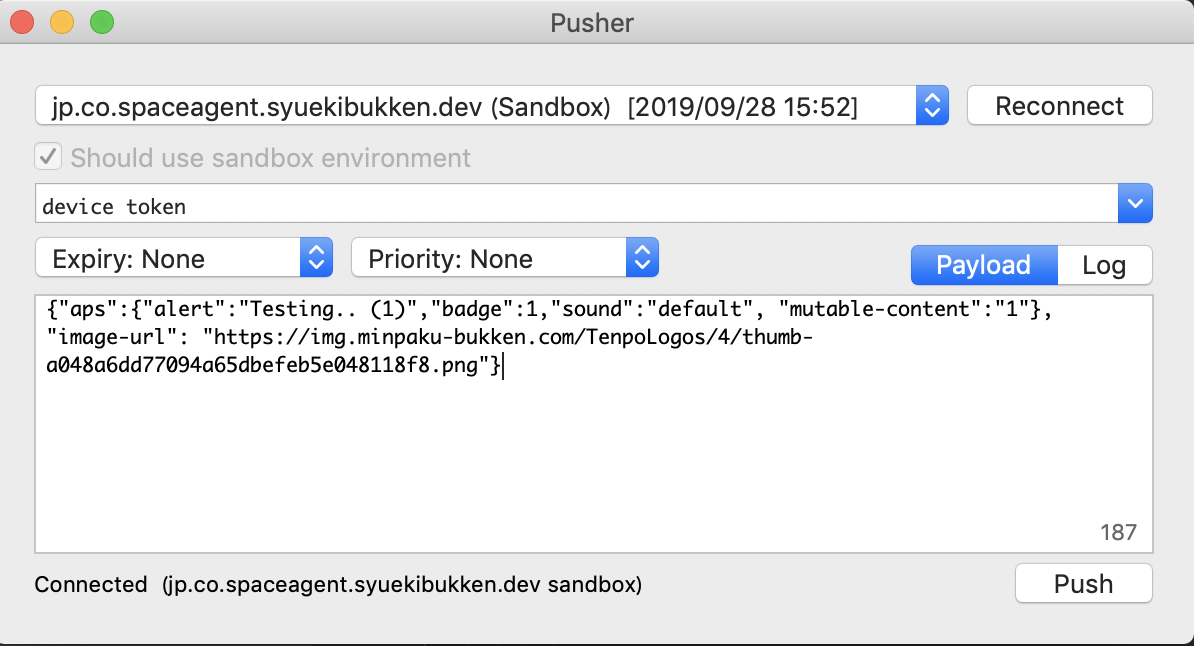
これで画像URLを受け取りPush通知で表示する準備が整いました!実際にPush通知を送信してみます。 NWPusherというAPNsに簡単にプッシュ通知を送れるMacアプリがあるので、こちらを使います。
func application(_ application: UIApplication, didRegisterForRemoteNotificationsWithDeviceToken deviceToken: Data) {
    let deviceTokenString: String = deviceToken.map { String(format: "%.2hhx", $0) }.joined()
    print("deviceTokenString \(deviceTokenString)")
}
Pushボタンを押すと画像つきのPush通知が届きました!

FCMからの送る部分の実装
冒頭に言ったように収益物件.comではFCM経由でPush通知を送信しているので、FCMへの送信部分のpayloadを以下のようにします。
const payload = {
    notification: {
        title: 'Push通知テスト',
        'mutable_content': '1',
    },
    data: {
        'image-url': 'https://img.minpaku-bukken.com/TenpoLogos/4/thumb-a048a6dd77094a65dbefeb5e048118f8.png',
    }
};
firebase
.messaging()
.sendToDevice(fcmToken, payload)
.then(() => {
    console.log('success');
})
.catch(() => {
    console.log('error');
});

終わりに
プッシュ通知に画像をいれると印象が変わると思います。収益物件.comは9月にリリースしたばかりで、よりユーザーが快適で便利に使えるアプリにするために、これから様々な改善をしていきますので、乞うご期待ください。
参考
https://medium.com/@lucasgoesvalle/custom-push-notification-with-image-and-interactions-on-ios-swift-4-ffdbde1f457 https://developer.apple.com/jp/documentation/NetworkingInternet/Conceptual/RemoteNotificationsPG/ModifyingNotifications.html